Category: Uncategorized

  • Interactivity Studio vs. Thinglink: Better Interactive Image Options for Educators

    A lively classroom with an interactive digital screen displaying colorful historical maps and biology diagrams, surrounded by various educational materials for dynamic learning.
    A lively classroom with an interactive digital screen displaying colorful historical maps and biology diagrams, surrounded by various educational materials for dynamic learning.

    Introduction

    Engaging students in today’s digital age requires more than traditional teaching methods. As attention spans shorten and learning preferences shift toward visual and interactive mediums, educators are challenged to create content that not only captures interest but also fosters deeper understanding. By making lessons more dynamic and immersive, educators can spark curiosity and improve knowledge retention among students. This demand for innovative approaches has paved the way for interactive images, which transform static visuals into clickable, media-rich learning experiences that bring content to life. Platforms like Interactivity Studio and Thinglink are at the forefront of this shift, offering educators powerful tools to enhance engagement in the classroom.

    By transforming traditional visuals into engaging educational tools, interactive images enable students to explore content in a more meaningful way. With clickable hotspots that reveal additional information, videos, quizzes, or links, these images offer a multi-dimensional learning experience that not only captures attention but also deepens understanding. This innovative approach aligns perfectly with the demand for more engaging and interactive teaching methods in today’s classrooms.

    Examples of Interactive Images in Education

    Here are some examples of how interactive images are used in educational settings:

    1. Historical Maps: Students can explore historical events by clicking on specific locations to access detailed descriptions or video reenactments.
    2. Biology Diagrams: Interactive labels on diagrams of the human body or plant structures offer detailed explanations and related videos for deeper understanding.
    3. Engineering Concepts: Interactive blueprints of machines or structures provide insights into design principles and functionality.

    Benefits of Using Interactive Images

    The benefits of using interactive images are substantial:

    • They enhance student engagement, making the learning process more intriguing and personalized.
    • By catering to different learning styles—visual, auditory, and kinesthetic—these tools promote improved learning outcomes.
    • They encourage students to actively participate, fostering critical thinking and retention through exploration.

    How Educators Create Interactive Images

    Educators often utilize an interactive image maker to craft these experiences. These platforms allow teachers to easily integrate various media types and create tailored content that aligns with their curriculum objectives. However, with the vast number of programs available, it can be overwhelming to determine which one is the right fit for your needs. Each platform offers unique features, strengths, and potential drawbacks, making the decision-making process more complex. That’s why this blog post will provide an in-depth analytical comparison of Interactivity Studio and Thinglink—two highly regarded options for creating interactive content. By exploring their capabilities, advantages, and how they cater to different educational needs, you’ll be better equipped to choose the platform that aligns best with your teaching goals and classroom requirements.

    Thinglink is a wonderful platform for creating interactive images, especially in educational settings. It offers a wide range of features and supports various media types, making it a flexible tool for teachers looking to enhance their teaching methods. With a focus on education, Thinglink provides unique functionalities that promote immersive learning experiences.

    • 360/VR Content Support: This feature allows educators to create engaging virtual reality experiences, enabling students to explore immersive environments, interact with content in a hands-on manner, and gain a deeper understanding of complex topics through experiential learning.
    • Interactive Layout Options: Educators can utilize various layouts, such as text/media combinations, labeled text, questions, and even polls. These options provide flexibility in presenting information and assessing student comprehension.
    • Customization with Icons: Offering several icon customization options, Thinglink enables teachers to design interactive images that align closely with their lesson plans and visual preferences.

    Despite these advantages, Thinglink’s pricing model may pose challenges for individual educators or smaller institutions due to its expensive subscription structure. Its features are often more suited to larger organizations rather than individual use. This contrasts with Interactivity Studio which provides a more accessible option through lifetime access and seamless integration with platforms like WordPress.

    Interactivity Studio: An Overview

    Interactivity Studio is an innovative tool for creating interactive images, designed specifically for educators who value simplicity and functionality. With its user-friendly interface, Interactivity Studio ensures that even beginners can easily navigate through its features, making it an ideal choice for teachers looking to integrate technology into their lessons.

    Key Features of Interactivity Studio

    Interactivity Studio offers several key features that set it apart:

    1. Customizable Interactive Elements

    Interactivity Studio allows educators to create engaging content through customizable elements such as bubbles. These elements can incorporate text, images, and video, offering versatility in how educational material is presented.

    2. Seamless Integration with WordPress

    For educators maintaining class websites or blogs on WordPress, Interactivity Studio provides seamless integration. This feature simplifies the process of embedding interactive images into existing platforms without requiring extensive technical knowledge.

    3. Lifetime Access with Purchase

    Unlike many subscription-based services, Interactivity Studio offers lifetime access with purchase. This model is cost-effective for individual teachers who wish to avoid recurring fees.

    With these capabilities, Interactivity Studio not only enhances the teaching experience but also enriches student engagement by transforming static content into dynamic learning tools. The ease of use combined with robust customization options makes it a standout choice for those in the educational field.

    1. User Experience

    When looking at how Interactivity Studio and Thinglink are designed for users, we can see some clear differences that cater to different needs of educators.

    Interactivity Studio has a simple and easy-to-use design that is especially appealing for those who are new to creating interactive images. The interface is straightforward, user-friendly, and designed with beginners in mind. Users can easily navigate through the platform to create and customize interactive images without feeling overwhelmed by technical complexities.This simplicity is further enhanced by comprehensive tutorial videos and guides, providing step-by-step instructions to help new users navigate each feature with ease. Such resources ensure that even educators with limited technological expertise can effectively use interactive images in their teaching strategies.

    On the other hand, Thinglink offers a wide range of features but tends to cater more towards tech-savvy users or larger educational organizations. Its support for 360/VR content and various media types provides a broad canvas for creativity but may be intimidating for beginners. While Thinglink also offers tutorial resources, the extensive nature of its features may require additional time and effort to fully understand.

    By understanding these differences in user experience, educators can choose the platform that best fits their skill level and educational goals.

    2. Customization Options

    A comparison between Interactivity Studio and Thinglink highlights Interactivity Studio as a more suitable tool for educators, primarily due to its user-friendly design and affordability. When it comes to customization options, both tools offer unique features that cater to different needs, but Interactivity Studio provides a more streamlined approach.

    Interactivity Studio’s Bubbles

    One of the standout features of Interactivity Studio is its customizable interactive elements known as bubbles. These bubbles can include text, images, and videos, enabling educators to create engaging and immersive content effortlessly. What sets Interactivity Studio apart is its ability to allow users to segment specific parts of an image and turn them into interactive buttons. This precise customization helps highlight exact areas of focus without cluttering the overall design, making it ideal for creating clean, organized educational materials.

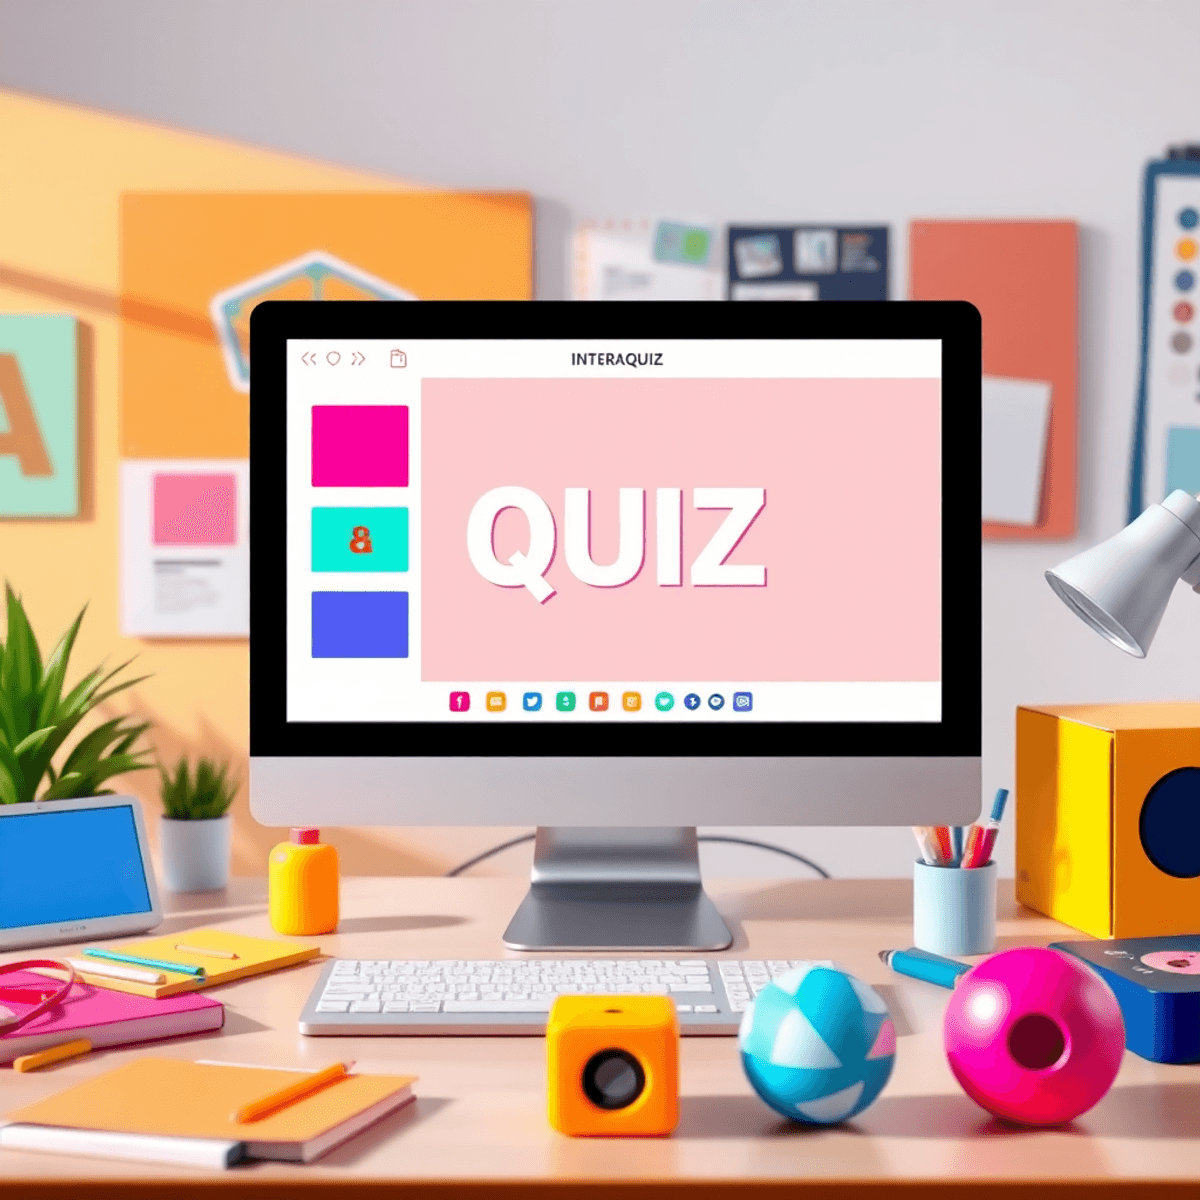
    Here’s a fun example of a quiz educators can create for their students using Interactivity Studio to make learning more interactive and engaging.

    Thinglink’s Icons

    On the other hand, Thinglink provides a range of icon customization options, such as labeled text, questions, and polls. Users can also change the symbol displayed on a button and customize the color to match their design preferences. However, unlike Interactivity Studio, Thinglink only allows users to place buttons as overlays on the image, rather than segmenting specific parts of the image itself. This limitation can make it harder to create precise, interactive zones for educational purposes. Additionally, while the shape of the icons can be altered, their size cannot be adjusted, which can lead to a cluttered appearance when multiple icons are added. These features, while robust, may be more suited for larger organizations with complex content needs rather than individual educators seeking clarity and simplicity in their projects.

    3. Pricing Structure

    When comparing Interactivity Studio and Thinglink, the pricing structure becomes a significant factor for educators looking for interactive image tools that offer value for money. Interactivity Studio is particularly appealing due to its affordability, making it a preferred choice for individual teachers and small educational institutions.

    Interactivity Studio offers:

    • Lifetime access with purchase: This model ensures that users can make a one-time payment and continue to use the software indefinitely.
    • Cost-effectiveness: Particularly advantageous for educators who need budget-friendly solutions without recurring fees.
    • Flexible pricing: Tailored towards individuals or smaller organizations, making it accessible to a wider range of users.

    Thinglink employs a subscription-based model:

    • Subscription costs: Can be relatively high, especially for individual users or small educational entities.
    • Targeted at large organizations: The pricing often reflects features designed for more extensive use, which may not be necessary for smaller-scale applications.

    The difference in pricing models highlights Interactivity Studio as a more accessible option for educators who prioritize cost-efficiency alongside a beginner-friendly design.

    Visual Comparison: Key Features Table

    When evaluating Interactivity Studio and Thinglink for creating interactive images in education, a side-by-side comparison reveals distinct advantages and limitations for each tool. Below is a visual comparison table outlining their key features:

    FeatureInteractivity StudioThinglink
    User InterfaceSimple, beginner-friendlySlightly more complex, suited for experienced users
    Customization
    Options
    Interactive bubbles (text, image, video) and segmented buttons for precise focusIcons with various interactive layouts; customizable symbols and colors
    Media SupportImages, text, videosImages, text, videos, 360/VR content
    Pricing StructureAffordable lifetime accessExpensive long-term subscription model
    Target AudienceIndividual educators and small institutionsLarge organizations

    The simplicity and affordability of Interactivity Studio make it a superior choice for individual educators and smaller institutions looking to enhance student engagement through interactive images. Its seamless integration with WordPress and customizable elements provide versatility that directly caters to the needs of teachers. In contrast, Thinglink offers extensive media support and is better suited for larger organizations due to its robust features and higher price point.

    This table aims to aid educators in making an informed decision by clearly highlighting the strengths and weaknesses of each tool in the context of educational use.

    Conclusion

    Interactivity Studio is a versatile tool that goes beyond interactive image creation to enhance educational experiences. It empowers educators to customize content according to their teaching methods, making lessons more engaging and memorable. With features like customizable text, images, and videos, Interactivity Studio transforms traditional static content into an interactive learning journey.

    Educators looking to improve their teaching methods will greatly benefit from Interactivity Studio user-friendly interface and seamless integration. If you’re exploring options for selecting the right educational tool, Interactivity Studio stands out as an excellent choice for enriching classroom interactions and boosting student engagement.

    Why wait? Try out Interactivity Studio today and discover its potential in enhancing classroom engagement!

  • Top 5 Alternatives to Interactive IMG for Creating Interactive HTML Images

    A vibrant collage of interactive HTML image tools, showcasing creative icons and symbols in a realistic style to represent innovation and technology.

    Introduction

    Interactive HTML images are essential for increasing user engagement by turning stale images into exciting content that grabs people’s attention. These interactive features provide a more immersive experience for viewers, whether they’re used in online learning platforms, business presentations, or creative design portfolios.

    In this article, we’ll explore the top 5 alternatives to Interactive IMG for creating engaging and interactive HTML images. We’ll delve into powerful tools like Image Map Pro, WP Draw Attention, Genially, Thinglink, and Interactivity Studio.

    Each of these tools has its own unique features and capabilities, making them suitable for various needs and preferences. If you’re looking for alternatives to Interactive IMG, this guide will walk you through these options, highlighting their strengths and functionalities.

    Whether you want to create clickable hotspots, interactive maps, or visually stunning content, understanding these tools will help you make better choices.

    Understanding Interactive HTML Images

    Interactive HTML images transform static visuals into dynamic experiences, allowing users to engage directly with the content. These images are designed to be interactive through clickable areas, often called hotspots, which can trigger actions such as displaying information or redirecting to a different webpage.

    Use Cases Across Industries:

    1. Education

    Teachers use interactive images to create engaging learning materials. For example, a biology teacher might create an interactive diagram of the human body, where students can click on different organs to learn more about their functions.

    2. Business

    Companies leverage interactive images for product showcases. A retailer could use these images to highlight various features of a new product, enhancing the online shopping experience.

    3. Design

    Designers use interactive HTML images in portfolios or presentations. By incorporating clickable elements, they can provide deeper insights into their design process or showcase different project stages.

    Exploring the Limitations of Interactive IMG

    Interactive IMG provides some notable features for those looking to create dynamic content, but it also comes with limitations. It offers an interactive image maker designed to help users easily incorporate clickable hotspots into their HTML images. However, there are several drawbacks that potential users should consider.

    Key Features of Interactive IMG

    • Affordable Pricing: $5.60 per month or $60 annually.
    • Ease of Use: Simplified interface for quick setup and implementation.

    Challenges

    • Limited Creation Capabilities: Restrictions on the number of images and hotspots users can create.
    • Minimal Hotspot Customization: Lack of flexibility limits creativity and personalization.
    • Distracting Hotspot Button: Fixed size and pulsing effect can detract from the overall user experience.
    • Subscription Model: While affordable initially, long-term costs can be prohibitive for some users.

    Understanding these limitations is crucial as you explore alternatives that might better meet your needs for creating engaging HTML images.

    5 Best Alternatives to Interactive IMG

    Here are five powerful tools for creating engaging and interactive HTML images:

    1. Interactivity Studio

    Interactivity Studio is a powerful tool for creating engaging interactive HTML images. It is designed for both beginners and advanced users, offering a user-friendly interface that makes the creative process easier.

    Key Features

    • Customizable Interactive Elements: Create tailored interactions, such as clickable hotspots with text, images, or video for diverse applications.
    • Outline Specific Parts of an Image: Users can outline precise areas of an image to serve as hotspots. This feature is particularly beneficial for detailed visuals, as it allows for greater accuracy and interactivity.
    • Seamless Integration: Easily incorporate interactive elements into existing websites.
    • Comprehensive Guides: A range of tutorials and resources, including video guides, help users navigate the tool’s functionalities with ease, making it hyper beginner-friendly.

    Strengths

    • Flexibility in design and interaction customization.
    • Easy navigation and user support through detailed tutorials.
    • Suitable for applications in education, business, and design.

    2. Image Map Pro

    Image Map Pro is a powerful tool known for its ability to create intricate and detailed maps. It caters to users seeking precise control over interactive elements.

    Pros

    • Customizable Maps: Image Map Pro excels in creating detailed interactive maps with superior precision and control
    • Ready-to-Use Templates: Access free, pre-made maps from various global regions for quick customization.

    Cons

    • Learning Curve: More complex compared to alternatives, requiring time investment from new users.
    • Limited Tutorial Formats: Text and screenshot-based guides may not cater to users who prefer dynamic video tutorials.

    3. WP Draw Attention

    WP Draw Attention is optimized for WordPress users, providing a seamless plug-in experience for creating interactive images directly within WordPress sites.

    Key Features:

    • WordPress Integration: Designed for easy installation and use as a WordPress plug-in.
    • Several interactive layout options, including tooltips, lightboxes, and multiple directional displays for versatility
    • Intuitive drawing tools with customizable color highlights for shapes.

    Limitations:

    • WordPress Dependency: Not ideal for users outside the WordPress ecosystem.

    4. Genially

    Genially is a feature-rich platform designed to create visually stunning and interactive content. It’s ideal for users seeking a creative edge in their projects, but it also comes with certain challenges.

    Key Features:

    • Templates for Various Projects: Genially offers an extensive collection of templates, making it easier to start projects quickly.
    • Collaboration Capabilities: The platform supports team projects, allowing multiple users to work on the same document simultaneously.
    • Brand Kit Integration: Helps maintain consistent branding by enabling users to customize templates with their brand assets.
    • Extensive Customization Options: Provides unparalleled freedom in design, though this comes at the cost of a more cluttered and complex user interface.

    Cons:

    • Expensive Subscription: Pricing starts at $15/month for the Pro plan and $25/month for the Master plan, making it one of the costlier options.
    • High Entry Skill Requirement: The freedom Genially provides often requires advanced skills, which can be intimidating for beginners.
    • Most Features Locked Behind Master Plan: Some of the most powerful functionalities are only available in the higher-tier subscription.

    Given these challenges, users may find it more practical to explore alternative tools that offer similar capabilities with a less complex learning curve or more cost-effective pricing options.

    Thinglink excels in creating interactive and immersive content, making it a versatile choice for various industries. It offers unique features that enhance visual storytelling and user engagement.

    Key Features:

    • 360/VR and 3D Models: Supports advanced media types, such as virtual reality and 3D models, for creating truly immersive experiences.
    • Icon Customization: Provides several options to customize icons, allowing creators to tailor the appearance to suit their projects.
    • Interactive Layouts: Offers multiple layout options, including text/media overlays, labeled text, questions, and polls, adding depth to the content.
    • Interactive Videos: Allows users to create interactive videos, making it an excellent tool for storytelling or instructional content.

    Cons:

    • Expensive Subscription: Pricing can be prohibitive, particularly for smaller organizations or individual creators.
    • Best Suited for Large Organizations: While powerful, its feature set and cost structure are more aligned with the needs of large enterprises rather than small businesses or solo users.

    Given its higher cost and focus on enterprise-level features, users from small organizations or individuals may benefit from exploring alternative tools like Interactivity Studio, which offers similar functionality with greater affordability and ease of use.

    Comparative Analysis

    ToolRating (/10)LimitationsBest For
    Interactivity Studio9.5 Analytics coming soonIdeal for any user creating interactive images easily
    Image Map Pro8.2 Steep learning curve
    Limited tutorial formats
    Professionals needing detailed, precise interactive maps
    WP Draw Attention7.8 Optimized mainly for WordPress ecosystemWordPress users seeking simple interactive features
    Genially8.0 Expensive subscription
    High entry skill requirement
    Advanced users creating rich, collaborative visuals
    Thinglink8.7Expensive
    Geared towards large organizations
    Large organizations creating immersive storytelling content
    Interactive IMG7.5 Limited customization
    Distracting hotspot buttons
    Beginners with basic interactive image needs

    Conclusion

    In this article, we explored the top 5 alternatives to Interactive IMG for creating engaging and interactive HTML images. These powerful tools include Image Map Pro, WP Draw Attention, Genially, Thinglink, and Interactivity Studio.

    Among these options, Interactivity Studio stands out as the best choice. It offers a user-friendly interface, comprehensive tutorials, and customizable interactive elements. These features give creators the flexibility to craft unique and engaging content that captivates audiences across various industries.

    Whether you want to enhance visual storytelling or create dynamic educational materials, Interactivity Studio has the perfect solution for your interactive image needs.

    Ready to create captivating content? Try Interactivity Studio and discover how easy it is to turn your ideas into interactive experiences!

  • Best Interactive Map Tools: Alternatives to Map SVG and Drawpoint

    A digital interactive map displayed on a computer screen, featuring multimedia elements like videos and images, set in a modern workspace with design tools.
    A digital interactive map displayed on a computer screen, featuring multimedia elements like videos and images, set in a modern workspace with design tools.

    Introduction

    Interactive maps have become essential in crafting engaging and dynamic content. They transform static visuals into interactive experiences, captivating audiences and enhancing user engagement. Whether you’re a business aiming to enrich presentations, an educator looking to create immersive learning environments, or a designer wanting to add depth to your projects, the right tools can make all the difference.

    We’ve compiled a selection of the best interactive map tools available today. This article explores their features, use cases, and benefits, with a focus on popular options like MapSVG and Drawpoint. Discover why Interactivity Studio emerges as the top choice for creating visually impactful interactive maps.

    1. Interactivity Studio

    Interactivity Studio is a cutting-edge tool designed to transform static images into dynamic, interactive content. This platform provides a comprehensive suite of features that cater to both novice users and seasoned designers looking to create visually impactful and engaging maps.

    Key Features:

    • Advanced Customization Options: Interactivity Studio allows you to outline specific parts of an image to serve as interactive buttons. This feature enables users to segment elements within an image, making multiple objects interactive simultaneously.
    • Customizable Interactive Elements: Through the use of “bubbles,” you can attach links, images, videos, or text to different segments, enhancing user engagement and making images clickable.
    • Precision Tools: With the ability to zoom in for greater accuracy, users can meticulously outline items on an image, ensuring precision in their interactive elements.
    • Seamless Integration Capabilities: The tool offers seamless integration with various platforms, ensuring that your interactive maps can be easily embedded and utilized across different mediums.
    • User-Friendly Interface: Designed with simplicity in mind, Interactivity Studio features a straightforward interface that caters to beginners and those who prefer a more efficient and streamlined experience while still offering the flexibility needed for creative projects.
    • Comprehensive Tutorials: A range of tutorial videos/guides are available, allowing new users to quickly learn how to utilize the software effectively. This support makes it easier for anyone to start creating interactive content without a steep learning curve.

    Use Cases and Target Audience:

    Interactivity Studio is ideal for:

    1. Businesses aiming to enhance their marketing strategies with interactive maps or presentations.
    2. Educators looking for tools to create engaging learning materials that captivate students’ attention.
    3. Designers seeking software that produces visually appealing projects with interactive elements adding depth and engagement.

    With lifetime access upon purchase, Interactivity Studio presents a valuable investment for those seeking robust customization options combined with user-friendly functionality. Whether you’re creating educational resources or dynamic marketing visuals, this tool offers the versatility needed to bring your projects to life.

    2. MapSVG

    MapSVG is a feature-rich tool designed for creating highly customizable interactive maps using SVG (Scalable Vector Graphics) files. With access to a wide variety of free vector maps and robust customization options, it’s a powerful solution for users comfortable working with SVG files and vector editing software.

    Key Features:

    • Free SVG Maps: Provides a library of free blank vector maps that users can download and customize for their projects.
    • Integration with WordPress: Works seamlessly as a WordPress plugin, enabling users to add interactive maps to their WordPress sites with ease.
    • Google Maps Overlay: Allows users to add custom SVG overlays to Google Maps, making it easier to personalize maps with detailed, location-specific visuals that work seamlessly with Google Maps features.

    Limitations

    While MapSVG is powerful, it has some notable drawbacks that may make it less suitable for certain users:

    • Steep Learning Curve: The plugin’s advanced customization features rely heavily on users’ familiarity with SVG files and vector editing software like Adobe Illustrator or Inkscape. Beginners or users without basic design experience may find it challenging to navigate at first.
    • Limited Integration for Non-WordPress Websites: While it integrates well with WordPress, using MapSVG on non-WordPress websites is more complicated and requires additional setup, which could be a barrier for users looking for broader compatibility.
    • Complex Setup: The initial setup and configuration can feel overwhelming, especially for users unfamiliar with vector graphics or who need quicker, more straightforward solutions.
    • Not Beginner-Friendly: Unlike platforms designed for simplicity, MapSVG prioritizes flexibility and customization, which might intimidate users seeking a more intuitive interface.

    MapSVG excels for users with experience in SVG editing and WordPress integration, offering unparalleled customization for interactive map projects. However, for those seeking an easier-to-use platform with broader compatibility and simpler customization options, alternatives may be a better fit.

    3. Drawpoint

    Drawpoint stands out for its robust customization options, enabling businesses to create interactive maps that align seamlessly with their branding and functionality needs. From tailored map themes to custom markers and popups, the platform offers flexible tools to build engaging and creative visual experiences.

    Key Features:

    • Drag-and-Drop Editor: Add and adjust markers, shapes, lines, and other elements with a real-time visual editor.
    • Customizable Themes: Design a map that aligns perfectly with your brand by adjusting colors, styles, and elements.
    • Various Drawing Tools: Create custom shapes, routes, markers, and labels to highlight specific areas of the map.
    • Analytics Dashboard: Monitor engagement trends and interaction data to gain insights into how users interact with your content.

    Limitations

    While Drawpoint offers a solid foundation for creating interactive maps, it has notable limitations that may not meet the needs of businesses looking for more advanced or versatile solutions.

    • No Advanced Image Interactivity: Unlike tools that allow users to outline specific parts of an image for interactivity, Drawpoint’s functionality is restricted to adding markers, shapes, or routes, which might not provide the level of precision some projects require.
    • Limited Video Integration: Drawpoint restricts video interactivity to YouTube videos, preventing users from uploading and using their own video content. This limitation reduces flexibility for businesses that rely on custom video assets to create engaging, multimedia-driven experiences tailored to their brand.
    • Lack of Advanced Tutorials: While Drawpoint offers many customization options, the platform can feel a bit intimidating to navigate for first-time users. The limited availability of comprehensive tutorials or advanced training materials means users may struggle to fully understand and take advantage of all the features, especially when tackling more complex projects.

    How Interactivity Studio Bridges the Gaps

    When choosing an interactive map tool, it’s essential to find a platform that not only offers robust features but also overcomes the limitations of other programs. Interactivity Studio excels in precisely this regard, addressing the common drawbacks seen in both MapSVG and Drawpoint while delivering a superior experience.

    1. Overcoming Complexity and Learning Curves: Both MapSVG and Drawpoint can be intimidating for new users due to steep learning curves or lack of comprehensive guidance. Interactivity Studio eliminates this barrier with its intuitive design and detailed tutorial videos/guides, empowering users of all skill levels to create engaging content without frustration.
    2. Expanding Customization Beyond Limits: While MapSVG relies heavily on SVG editing expertise and Drawpoint focuses on basic drawing tools, Interactivity Studio provides unparalleled customization capabilities. It allows users to outline specific parts of an image, attach multimedia elements like videos, images, and text, and precisely control interactivity. This flexibility ensures businesses, educators, and designers can achieve their unique goals without compromise.
    3. Simplifying Integration Challenges: Unlike MapSVG, which is primarily tailored for WordPress, Interactivity Studio makes embedding interactive maps and images into your website far easier. With straightforward tools and clear instructions, users can seamlessly integrate their content into websites without the technical hurdles that may be encountered with other applications. This ease of use ensures that your interactive elements are ready to engage your audience quickly and efficiently, regardless of the platform.
    4. Enhancing Multimedia Capabilities: While Drawpoint restricts video content to YouTube links, Interactivity Studio supports fully customizable multimedia integration, enabling users to upload their own videos, images, and text. This feature empowers creators to personalize their content while maintaining brand consistency.
    5. Built for Versatility: Interactivity Studio stands out for its ability to adapt to a wide range of needs and industries. Whether you’re creating marketing materials, educational resources, or design projects, the platform’s customizable features and multimedia integration make it versatile enough to handle diverse applications. This flexibility ensures users can rely on it for various creative endeavors, unlike tools like Drawpoint and MapSVG, which are more specialized in their focus.

    Ultimately, Interactivity Studio provides the perfect balance of power, flexibility, and ease of use. It not only fills the gaps left by other programs but also elevates what’s possible in interactive map creation. Whether you’re a business professional, educator, or designer, Interactivity Studio equips you with the tools needed to transform your static visuals into dynamic, engaging experiences.

    Make the smarter choice for your interactive projects—choose Interactivity Studio and unlock the full potential of your content!

  • Genially vs. Interactivity Studio: Better Options for Interactive Quizzes

    A computer screen with an interactive quiz in a bright workspace, surrounded by colorful templates, design tools, and multimedia elements, conveying creativity and engagement.
    A computer screen with an interactive quiz in a bright workspace, surrounded by colorful templates, design tools, and multimedia elements, conveying creativity and engagement.

    Introduction

    Creating engaging and interactive quizzes has become a cornerstone in educational and professional settings. Two popular tools in this domain are Genially and Interactivity Studio, both designed to improve the way we create interactive content.

    Genially is known for its robust set of features, including a vast library of templates and multimedia resources that cater to diverse creative needs. On the other hand, Interactivity Studio offers an intuitive interface geared towards simplicity and ease of use, making it particularly appealing for beginners or people who prefer straightforward content creation tools

    Choosing the right platform to create interactive quizzes often comes down to understanding your specific needs, budget constraints, and the level of technical expertise required. Genially’s subscription model can be costly over time, especially for those requiring advanced features; its learning curve may not suit everyone either. Conversely, Interactivity Studio provides a cost-effective solution with lifetime access upon purchase, avoiding recurring fees while offering extensive tutorial support.

    This post will guide you through a comparison between Genially and Interactivity Studio. By examining their pros and cons, you will be equipped to make an informed decision on the best tool for crafting interactive quizzes tailored to your specific needs.

    Overview of Genially

    Genially is a powerful platform known for its ability to create interactive content, such as presentations, infographics, quizzes, and training materials. What sets Genially apart is its wide selection of over 1100 templates, which makes the process of finding inspiration for projects much easier. These templates cover various categories, including gamification and education, allowing users to efficiently design engaging materials.

    Key Features

    Extensive Library of Templates

    With an impressive array of templates, Genially empowers users to develop visually appealing projects without needing advanced design skills.

    Multimedia Resources

    Easily add videos, animations, or clickable images by integrating external elements like YouTube videos or Google Maps. Learning how to make an image clickable is a structured process.

    Drag-and-Drop Interface

    Genially’s user experience is enhanced by its drag-and-drop functionality, providing a creative and efficient way to edit and personalize content.

    Pros and Cons

    Pros

    • Variety of Tools: The platform offers a wide range of tools to support diverse creative needs.
    • Engagement Tracking: Tools for monitoring user interaction enhance its utility in educational settings.
    • Offline Capabilities: Downloadable HTML format supports offline access.

    Cons

    • Subscription Costs: To unlock full potential, users may find subscriptions necessary.
    • Learning Curve: Although designed to be user-friendly, mastering all features can take time.
    • Lack of Tutorial Videos: The platform could benefit from more instructional resources to help users maximize its features.

    In essence, while Genially offers a wealth of resources and features, it also presents challenges related to cost and the availability of comprehensive user guides.

    Overview of Interactivity Studio

    Interactivity Studio is a powerful tool specifically designed to create interactive quizzes and educational content. Its straightforward, user-friendly design makes it an ideal choice for beginners. You can jump right into creating your projects without being bogged down by complex features.

    Key Features of Interactivity Studio:

    1. Comprehensive Tutorial Resources: New users benefit from multiple tutorial videos/guides that make it easy to learn how to use the software efficiently. These resources are invaluable for a smooth onboarding process.
    2. Customization Options: The platform excels in allowing you to customize interactive elements. For example, you can outline specific parts of an image to act as clickable buttons, enhancing engagement.
    3. Seamless Integration: Interactivity Studio offers seamless integration with various platforms, ensuring that your interactive quizzes fit perfectly within your broader educational or presentation goals.
    4. Lifetime Access Model: Upon purchase, users receive lifetime access, providing long-term value without recurring subscription costs. This model ensures you have continuous access to all features without worrying about monthly fees.

    The interface’s simplicity doesn’t compromise its functionality. While it may lack some advanced creative features found in more complex platforms like Genially, the focus on simplicity ensures a streamlined experience. This trade-off might be beneficial if you’re prioritizing ease-of-use over extensive creative capabilities.

    Despite the absence of certain advanced features, Interactivity Studio stands out due to its intuitive design and comprehensive support resources. Its robust customization options and seamless integration capabilities make it a versatile choice for educators and creators focused on engaging their audience through interactive content.

    Genially vs. Interactivity Studio Comparison Table

    Feature/AspectGeniallyInteractivity Studio
    Ease of Use❌ Complex UI, steep learning curve✅ Intuitive, beginner-friendly interface
    Pricing Model❌ Expensive monthly/yearly subscriptions✅ One-time purchase with lifetime access
    Customization❌ Complex customization process✅ Straightforward yet powerful customization
    Tutorial Resources❌ Limited, sometimes outdated tutorials✅ Extensive, up-to-date learning resources
    Customer Support✅ Extensive, up-to-date FAQ sections✅ Responsive support team
    Feature Accessibility❌ Many features unavailable unless you upgrade subscription✅ All core features available with purchase
    Value for Money❌ Recurring costs add up significantly✅ Superior long-term value

    While Genially offers a broader range of creative tools, Interactivity Studio provides a more focused, cost-effective, and user-friendly solution that is especially effective for interactive quiz creation. Its straightforward approach, comprehensive support, and lifetime access model make it a reliable choice for most users.

    Why Interactivity Studio Stands Out

    What Sets it Apart

    Interactivity Studio shines as a powerful tool for creating interactive quizzes. Its simplicity in design makes it accessible even to beginners, ensuring that you can start crafting engaging content without a steep learning curve. The platform’s excellent customer support further enhances this ease of use, providing guidance and resources when needed.

    The cost-effectiveness of its lifetime access model is another major advantage. Unlike Genially, where subscription costs can accumulate over time, Interactivity Studio offers lasting value with a one-time purchase. This makes it an attractive option for those looking to manage their budgets effectively while still gaining access to robust features.

    Enhanced User Experience

    The simple UX design of Interactivity Studio contrasts sharply with Genially’s more complex UI. This clutter-free environment allows you to focus on creativity rather than navigating through excessive options. The streamlined interface not only saves time but also minimizes frustration, making your workflow more enjoyable.

    Versatility and Compatibility

    Interactivity Studio provides versatile customization options that cater to various interactive elements like text, images, and videos. This flexibility ensures that you can tailor your quizzes to fit different educational or entertainment needs. Additionally, its seamless integration capabilities with multiple platforms enhance compatibility—ensuring your projects can easily reach a broader audience.

    Choosing Interactivity Studio means opting for a tool that prioritizes user-friendliness and financial accessibility without compromising on quality or functionality. Its key advantages and thoughtful design make it the ideal choice for anyone focused on creating interactive quizzes efficiently and effectively.

    Conclusion

    When comparing Genially and Interactivity Studio for creating interactive quizzes, each platform has its own strengths.

    Genially has a wide range of templates and multimedia resources, as well as powerful integration capabilities. However, its subscription model can be expensive, and its complex interface may not be suitable for beginners.

    On the other hand, Interactivity Studio stands out as a better option because it prioritizes simplicity and user-friendliness. Its lifetime access purchase model offers long-term value without ongoing costs, making it an appealing choice for users on a budget. The platform’s customizable interactive elements and seamless integration capabilities provide significant flexibility, while comprehensive tutorial resources ensure a smooth onboarding process for new users.

    For those focused on creating interactive quizzes efficiently, the ease of use and supportive features make Interactivity Studio an excellent choice.

    Try Interactivity Studio for free today! Discover how this user-friendly platform can elevate your interactive content creation with minimal effort.

  • The 4 Pillars of Wellness


    This project is a visually engaging interactive guide to the 4 Pillars of Wellness: Physical Health, Mental Health, Social Wellness, and Spiritual Wellness. Using a clean, nature-inspired cover image, the design invites users to hover over each section to explore detailed descriptions of these vital components of well-being. Each pillar highlights its unique contributions to achieving a balanced and fulfilling life, offering insights and actionable tips to inspire personal growth and resilience.

    The interactivity and functionality of this project were made possible using Slicpix’s Interactivity Studio, which transformed the static design into a more dynamic and engaging experience. This guide serves as an example of how the tool can be used to create interactive visuals that present information in a way that is both user-friendly and visually impactful.

  • The Power of Interactive Storytelling in Digital Media

    Content is everywhere. What makes someone pause, engage, and connect with you? If you want your audience to care, you need to give them a reason to stop scrolling and start engaging.

    Interactive storytelling has emerged as a revolutionary tool, blending technology and narrative to create deeply immersive experiences.

    At Interactivity Studio, we harness the power of interactive storytelling to captivate audiences and elevate brands.

    For example, imagine an eco-friendly clothing brand using interactive images to showcase its journey from sourcing sustainable fabrics to creating its final product.

    The brand inspires trust and authenticity by weaving storytelling into its landing pages, boosting customer engagement and conversions.

    This is an interactive image. Click on the red dress of the mannequin to uncover additional content.

    What Is Interactive Storytelling?

    Interactive storytelling goes beyond traditional linear narratives. It allows the audience to actively shape the story through clicks, choices, or exploration.

    This dynamic approach entertains and forms a deeper emotional connection between the audience and the content.  

    Unlike traditional storytelling, which presents a fixed narrative, interactive storytelling offers a dynamic experience where users can shape outcomes by making decisions, exploring environments, or participating in activities.

    Read more on our blog

    Why Interactive Storytelling Matters?

    Enhanced Engagement

    Audiences are no longer passive observers; they become participants. It leads to increased attention and a more substantial investment in the story.

    One primary reason interactive storytelling is gaining traction is its ability to engage audiences effectively.

    Traditional media often leaves viewers as passive observers; however, interactivity transforms them into active participants.

    This shift enhances emotional investment as users feel their choices have consequences within the narrative.

    Personalized Experiences

    Interactive storytelling adapts to user choices, creating a unique journey for each individual. This personalization fosters a sense of ownership and loyalty.

    Interactive storytelling allows for tailored experiences based on user preferences and choices.

    Each decision leads to unique outcomes, fostering a sense of ownership over the narrative journey.

    This personalization can significantly enhance customer loyalty as users feel more connected to brands that provide meaningful engagements.

    Memorability

    Interactive storytelling’s hands-on nature ensures that the content sticks, making it more likely to be shared and remembered. Its immersive nature ensures that content sticks with users.

    When people actively shape a narrative, they are more likely to remember it than passive consumption.

    This memorability translates into higher sharing rates across social media platforms.

    Data Insights

    Another significant advantage of interactive storytelling is its capacity for data collection.

    Brands can track user interactions—such as choices or time spent on specific sections—to gain valuable insights into audience preferences and behaviors.

    This data helps refine marketing strategies and improve future content offerings.

    Check out this article for more.

    Applications of Interactive Storytelling

    Marketing Campaigns

    Interactive storytelling can transform marketing efforts into memorable experiences.

    Whether launching a product, showcasing features, or telling a brand story, interactivity helps engage your audience and drive conversions.

    Interactive storytelling has revolutionized how brands connect with consumers.

    Instead of delivering static advertisements, companies now create engaging narratives that invite participation.

    Education and Training

    Interactive modules and gamified content transform learning into an exciting adventure.

    These tools improve knowledge retention while keeping learners motivated.

    E-Commerce Experiences

    Interactive catalogs, virtual try-ons, and customized recommendations turn online shopping into an engaging journey.

    These tools bridge the gap between physical and digital retail, enhancing customer satisfaction.

    Healthcare and Wellness

    Interactive content is gaining traction in healthcare, helping patients understand complex procedures or explore wellness journeys.

    For instance, an interactive 3D model of the human body can allow users to see the impact of specific treatments, empowering them with knowledge and confidence in their decisions.

    Watch more tutorials on our official YouTube channel.

    How Interactive Storytelling Drives Results

    Building Brand Trust

    Interactive storytelling establishes authenticity by showing—not just telling—a brand’s journey.

    Whether it’s tracing the origin of ingredients for an organic product or walking users through a company’s sustainability efforts, transparency strengthens trust.

    Driving Emotional Connections

    Stories that resonate on an emotional level are more likely to stick with audiences.

    By putting users at the center of the narrative, interactive storytelling deepens these connections, transforming casual viewers into loyal advocates.

    Interactive Storytelling Metrics: Measuring Success

    Success in interactive storytelling isn’t just about clicks or time spent—it’s about meaningful engagement. Brands can measure:

    User Interaction Rates: Track how often users engage with specific elements of the story.

    Completion Rates: Understand how many users complete the narrative journey.

    Decision Points: Analyze choices made to uncover user preferences and tailor future content.

    Looking Ahead: The Future of Storytelling

    The future of interactive storytelling lies in its ability to adapt and innovate. As audiences demand more personalized and immersive experiences, brands must stay ahead by embracing these trends.

    At Interactivity Studio, we’re constantly exploring new ways to tell stories that inspire, inform, and engage.

    Whether you’re a brand aiming to stand out or an educator looking to motivate learners, we have the tools and expertise to bring your vision to life.

    Ready to Elevate Your Story?

    Interactive storytelling is more than a buzzword; it’s the key to creating memorable, impactful connections. Let’s work together to craft a narrative that leaves a lasting impression.

    Create a free account on Interactivity Studio today to start your journey into the future of storytelling.

    Last things Last

    Interactive storytelling reshapes how we connect with audiences, blending creativity, technology, and personalization to craft experiences that captivate and inspire.

    Whether it’s enhancing marketing campaigns, revolutionizing education, or transforming e-commerce, this approach allows brands and creators to build deeper, more meaningful relationships with their audiences.

    As technology continues to evolve, the potential for interactive storytelling will only expand, offering limitless possibilities for innovation and engagement.

    At Interactivity Studio, we’re passionate about helping you harness this power to achieve your goals. Let’s collaborate to craft a compelling, interactive narrative that sets you apart.

  • Interactive Maps: 5 Simple Reasons Your Website Needs Them

    Welcome to Slicpix’s Interactive Studio! We’re passionate about helping businesses unlock the full potential of their websites through interactive maps. Today, we’ll explore how an interactive map can transform your site, delivering a more engaging and user-friendly experience.

    An interactive map does much more than guide your users from Point A to Point B. It invites them to intuitively and visually appealingly explore and engage with your content.

    From e-commerce and real estate to education and non-profits, interactive maps enhance your website’s functionality and create a lasting impression on visitors.

    1. Boost User Engagement and Exploration

    Interactive maps transform static browsing into an immersive experience, encouraging visitors to engage with your content actively. Integrating media, like images and videos, into a map makes it easy for users to interact, discover, and stay on your site longer. For example, real estate websites can use interactive maps to showcase property details, while educational institutions can highlight campus facilities.

    At Interactive Studio, we specialize in creating tailored map solutions that seamlessly integrate with your website, providing users an enriching and enjoyable experience.

    Benefits of Enhanced User Engagement:

    • Increased interactivity and time spent on your website
    • Encourages exploration of additional pages and content
    • Boosts overall user satisfaction and engagement
    School Image

    2. Improve Navigation and Directional Guidance

    Interactive maps are excellent tools for wayfinding, whether on a college campus, within a shopping center, or at a significant event. Visitors can quickly locate essential points of interest, saving time and improving their experience.

    Imagine a hospital website with a detailed map of facilities or a retail store guiding customers to the nearest location. Our customizable map solutions at Interactive Studio ensure visitors can navigate physical spaces effortlessly.

    Benefits of Enhanced Wayfinding:

    • Simplifies navigation in complex locations
    • Reduces user frustration and increases satisfaction
    • Keeps visitors informed and improves the overall experience

    3. Personalize Your Brand Experience

    Design interactive maps that align with your brand’s unique identity by selecting custom colors, icons, and styles. This consistent visual approach ensures a seamless browsing experience, enhancing user engagement and building brand recognition.

    Benefits of Personalization:

    • Enhances brand consistency across digital platforms
    • Strengthens brand loyalty by offering a unique user experience
    • Ensures a visually cohesive and professional look

    4. Boost SEO Performance and Visibility

    An interactive map can be vital to your website’s SEO by increasing user engagement and reducing bounce rates. When users stay longer on your site and actively explore content, search engines take notice, which can improve your rankings.

    Mobile-responsive maps are essential for today’s on-the-go users, helping boost your website’s SEO by attracting more organic traffic. Check out this link:

    https://interactivegeomaps.com/why-interactive-maps-on-your-website-enhance-customer-engagement/

    SEO Benefits of Interactive Maps:

    • Lowers bounce rates by keeping users engaged
    • Increases average time spent on site, signaling quality to search engines
    • Enhances mobile-friendliness, a key SEO ranking factor

    5. Present data clearly and Concisely

    With interactive maps, complex data becomes easy to understand at a glance. Whether you’re highlighting store locations, property values, or event venues, maps allow you to present information visually, making it accessible and engaging.

    Users can quickly find what they need, increasing the likelihood of them taking action—visiting a location or making a purchase.

    Benefits of Visual Data Representation:

    • Streamlines the presentation of complex information
    • Provides an intuitive, easy-to-digest experience for users
    • Drives conversions by guiding users to relevant actions

    Start Creating Your Custom Interactive Map with Interactive Studio

    Interactive maps bring your website to life, increasing engagement, aiding navigation, boosting SEO, and conveying information effortlessly.

    At Interactive Studio, we’re here to help you create a customized, user-friendly map that fits seamlessly into your website design. Unlock the benefits of interactive maps today!

    Check out our other blog on how to achieve that or videos:

    Final Thoughts

    Incorporating an interactive map into your website opens up opportunities to enhance user engagement, improve navigation, personalize the brand experience, boost SEO, and simplify data presentation.

    Interactive maps go beyond basic functionality, transforming how users interact with your site and helping you stand out in a competitive digital landscape.

    At Interactive Studio, we’re committed to providing businesses with customized, easy-to-integrate interactive maps that fit seamlessly into their websites. Elevate your site experience and connect with your audience in a new, dynamic way—start unfolding the benefits of interactive maps with Interactive Studio today!

  • Step-by-Step Guide to Adding Interactive Images to Your Website Using Interactive Studio

    Want to enhance your website with interactive images? Adding dynamic, clickable visuals can significantly boost engagement and create a more immersive user experience. Whether you want to showcase products, highlight critical areas of an infographic, or provide an interactive tour of a space, Interactive Studio makes it easy to achieve.

    This guide will show you how to create an interactive image using Interactive Studio, a versatile tool that seamlessly integrates with any website platform or builder.

    We’ll walk you through each step, from uploading your custom images to adding interactive elements like markers, shapes, and lines. By the end of this guide, you’ll have a visually engaging image and know how to embed it on your website effortlessly.

    Step 1: Sign Up for an Interactive Studio Account

    Before we create your interactive image, you’ll need to sign up for an Interactive Studio account. The platform offers a free plan and plans starting at $0/month, making it accessible for all budgets. Once you’re signed up, you’re ready to create your first interactive image.

    Step 2: Create a New Image

    After signing up and accessing your Interactive Studio dashboard, click on Drag & Drop new image.” Enter a name for your image and press “OK” to get started. It will take you to the image editor, where the magic happens.

    Step 3: Upload Your Custom Image

    In the editor, upload the image you want to make interactive. Interactive Studio supports standard formats like JPG, PNG, and  Avif. Your image will automatically resize to fit your website. 

    Step 4: Add Interactive Features (Markers, Shapes, and Lines)

    It is where your image starts to come to life. Interactive Studio lets you add different interactive elements to your image:

    • Markers are clickable points placed anywhere on the image, typically to display a small icon or highlight a feature.
    • Shapes: Use these to draw polygons around specific areas to highlight them.

    Adding Markers

    To add markers:

    1. Click the “Markers” button in the control bar, then select “New marker.”
    2. Click on the area of the image where you want the marker to appear.
    3. A sidebar will slide over, allowing you to add more details to the marker—such as a title, description, or image—and make it interactive.

    Check the Popup option if you’d like users to see a popup when they click the marker. You can also add a Call-to-Action (CTA) button here. This clickable link can direct users to any page of your choice when interacting with the marker. You just need to put your URL link.

    Once you’re happy with your image, it’s time to embed it on your website. In the share slide over, you’ll find an embed code that you’ll use to place the image on your site.

    Step 4: Embed the Image on Your Website

    Here’s how to do it:

    1. Copy the embed code from Interactive Studio.
    2. Paste the code into your website’s Image. 

    Final Thoughts

    Adding an interactive image to your website can transform a static page into an engaging, dynamic experience that captures users’ attention and encourages them to explore your content more meaningfully. Check out our YouTube channel for more.

    Instead of simply viewing an image, visitors can interact with various elements, such as clickable markers, highlighted areas, or navigational lines, which provide additional information or direct them to specific pages. This level of interactivity enhances user engagement and helps communicate your message more effectively.

    With Interactive Studio, creating interactive images is streamlined and user-friendly. The platform allows you to upload custom images, place interactive elements such as markers or shapes, and add clickable links or pop-ups to enrich the user experience.

    Whether you’re showcasing a product catalog, explaining a process through visuals, or creating a map, the possibilities are endless. The best part is that the images can be seamlessly embedded on any website platform, ensuring maximum compatibility and ease of integration.

    Interactive images do more than just enhance visual appeal—they improve the functionality of your site by making it more user-friendly and informative. As users engage with these images, they will likely spend more time on your site, exploring the content at their own pace.

    This interactivity can also lead to higher conversion rates, as the images guide users toward taking specific actions, such as learning more about a product, clicking on a call-to-action, or even making a purchase.

    Following the steps in this guide, you’ll have a fully interactive image ready to go in no time. It will transform your website into a more engaging, visually driven space that adds significant value to your content and user experience.

  • Tips and Tricks for Creating Effective Image Maps Using Interactivity Studio

    Success for any online platform these days lies solely in user engagement. One innovative way to engage audiences has been through interactive image maps. Slicpix’s Interactive Studio offers creative tools to craft interactive, aesthetically engaging image maps to enhance user experience. This all-encompassing tutorial guide discusses an interactive image map, its benefits, and how to apply Interactive Studio to create striking interactive experiences.

    What is an Interactive Image Map?

    Interactive image maps are diagrammatic illustrations that allow the user to interact with the elements of the picture. Hovering or clicking on parts of the map reveals more specific information, links, and other multimedia. This interaction makes the static image dynamic in how it develops and fosters curiosity to explore and get involved.

    Why Use Image Maps?

    Enhanced User Experience: Image maps can make navigation more intuitive and visually appealing.

    Space Efficiency: An image map allows you to utilize space effectively instead of cluttering your design with text links.

    Engagement: Interactive elements encourage users to explore content further.

    Benefits of Using Interactive Image Maps

    Better User Engagement: Offering users an opportunity to interact with content on your site will assure them that they will spend much more time on your website. The more satisfied users are with their interactions, the greater the likelihood of them returning.

    Better Information Retention: Interaction elements engage users actively with their learning processes. This active engagement contributes to better information retention rather than simply reading passively.

    Aesthetics: Images are always more fascinating compared to mere texts. Using interactive maps means you will visually keep the audience’s attention while imparting information.

    Navigation Ease: An image map will be intuitive for navigation. The user can easily spot sections or related products without reading much text.

    High Customization: Interactive studio gives you significant leeway in the design aspects. Hence, you can design a highly customized interactive map that fits your brand identity and aesthetic choices.

    Check out this article on the benefit of using interactive images-http://Check out this article on the benefit of using interactive images-

    How to Create Interactive Image Maps with Interactive Studio

    Step 1: Choose an Image

    First, pick an image that best describes what you are trying to convey. It can be anything from a product layout to a geographical map to an infographic.

    Step 2: Upload Your Image

    Go onto the Interactive Studio platform and upload your image. Ensure it is clear and correctly sized for best viewability on all platforms.

    Step 3: Create Interactive Regions

    Using interactive studio tools, draw rectangle, circular, or custom polygon shapes around the areas of your image that you want users to interact with.

    Step 4: Add Content

    Add relevant content, such as text descriptions, links, images, and videos, to each defined area. This added layer of information enriches user interaction and provides context.

    Step 5: Customize Visual Elements

    Add colors, hover effects, and animations to make it even more engaging. Use the various design features available in Interactive Studio. Ensure that they align with your branding.

    Step 6: Test and Publish

    Before going live, test each interactive area to ensure links open as they should and a seamless experience across different devices. Once satisfied, publish your interactive image map!

    Best Practices for Using Interactive Image Maps

    Keep It Simple: Ensure your image map is clear of the interactive areas; they are too much for users.

    Make it Mobile Responsive: Many users only use their phones to browse, so image maps must work on mobile.

    Give Instructions: If required, give short instructions about how users can interact with the map.

    Analyze User Interaction: Analytics allows you to observe the level of user interaction in terms of engagement. Therefore, create future versions with this analysis in mind.

    Conclusion

    Interactive image maps can offer users a more interactive environment and entertainingly deliver relevant content. Slicpix Interactive Studio makes it easier than ever to create dazzling interactive experiences. Following this detailed guide on best practices, you can change how users interact with your content and drive further success on your online platform.

    By following these steps, you can create engaging and informative interactive image maps that enhance user experience on your website. Whether you are showcasing products, sharing a story, or providing information, interactive image maps can be a powerful tool for visual communication.

    So why settle for static images when you can make them come alive with just a few clicks? Try Slicpix’s Interactive Studio today and take your visuals to the next level. Successful image mapping transforms static, non-clickable images into engaging, clickable, and informative elements on your website for your users.

    Remember, the recipe for success is simplicity, consistency, and regularity. Happy mapping!